
Pharos Cloud makes it easy to look after your lighting system from anywhere. You can reach every controller on every site from a browser, and you can add extra layers of protection beyond a password.
Pharos Cloud has recently added features that offer more secure ways to sign in and better visibility of where your account is in use. This article covers the security settings available to every Pharos Cloud user, as well as the extra controls available to organisations running their own Pharos Cloud Portal.
2. Passkeys
For every Pharos Cloud user
The following options can be configured from User settings, found by clicking the user icon at the top right of any page, then clicking Profile.
Turn on two-factor authentication
With two-factor authentication enabled, Pharos Cloud asks for a six-digit code from an authenticator app after your password. The code changes regularly, so your password is never the only thing protecting your account.
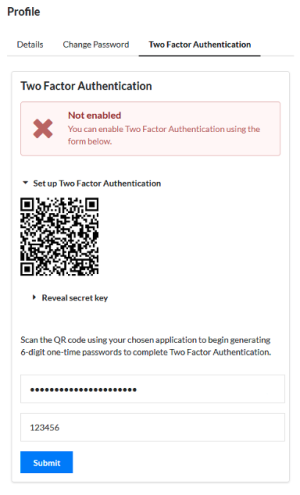
- In User settings > Profile, navigate to the Two-factor authentication tab.
- Scan the QR code with an authenticator app, such as Proton Authenticator. If you can’t scan, select Reveal secret key and enter the code to your app manually.
- Following the instructions on screen, enter your password and the current code from the app.
- Select Submit.
💡 Tip: Changing phones? Use Refresh secret key rather than switching two-factor off. This issues a new key through the same steps and keeps your account protected throughout.
Sign in with a passkey
A passkey replaces the password and code with your fingerprint, face recognition or screen lock. It is quicker than typing a code, and there is nothing to phish.
- In User settings > Profile, navigate toPasskeys.
- Select Register new passkey.
- Confirm with your fingerprint, face or screen lock when prompted by your browser.
Supported browsers also offer to create a passkey when you sign in.
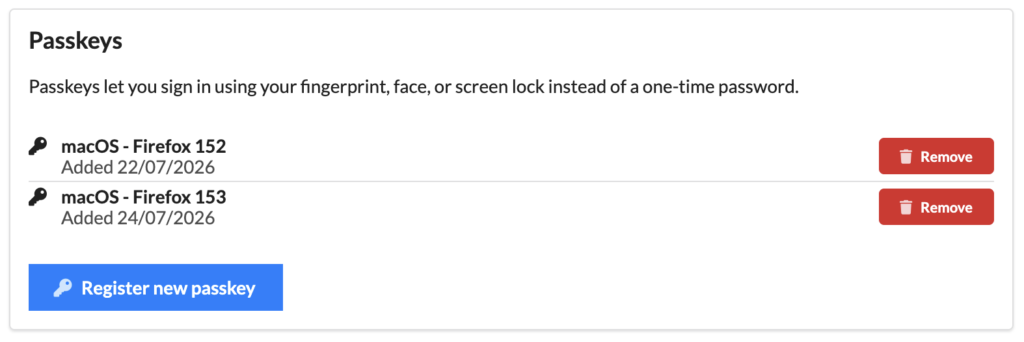
💡 Tip: A passkey belongs to the browser and device it was made on. Register one in each browser you use. If a laptop is lost or retired, select Remove beside its passkey.
See where you’re signed in
Every sign-in creates a session. The Sessions panel lists them, so you can spot a browser you don’t recognise or one you forgot to sign out of.
| Column | What it tells you |
| User agent | The browser and operating system used |
| Created | When you signed in |
| Last used | When the session was last active |
| Expires | When you’ll need to sign in again |
| Status | Current session for this browser, or Active for others still valid |
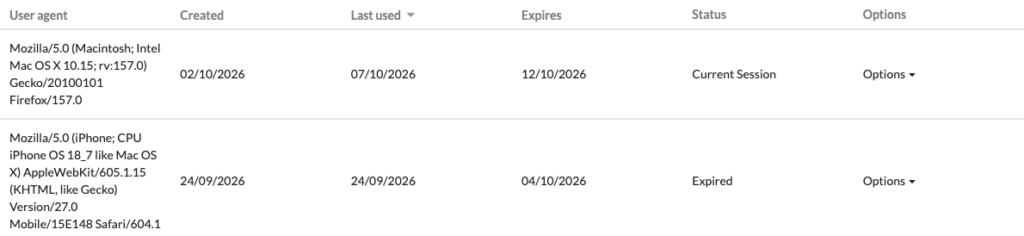
To sign out of a session, select Options on its row and click Invalidate. To sign out everywhere at once, select Invalidate All.
💡 Tip: After changing your password on a shared or borrowed machine, use Invalidate All to make sure nothing stays signed in. Enable Show expired/invalidated to see your full history.
Portal-only: security across your organisation
With your own Pharos Cloud Portal, you can take security even further by setting security rules for everyone, not just yourself.
Sign in with Microsoft
With Microsoft SSO enabled on the portal, the sign-in page offers a Microsoft account option. Users authenticate with Microsoft, and Pharos Cloud signs them in to the matching account. The match is made on email address, so the Microsoft account must use the same address as the portal account.
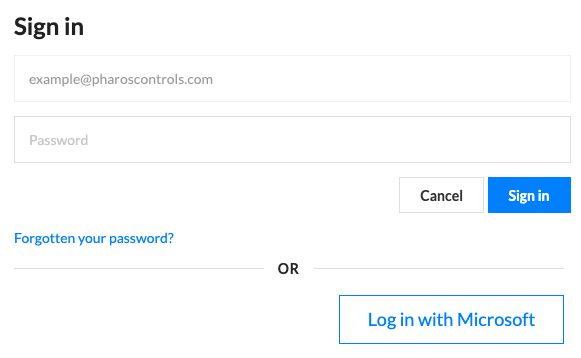
💡 Tip: SSO doesn’t create accounts. Users still need an invitation to a site first, so invite them with the email address they use for Microsoft.
Enforce two-factor authentication across a portal, or just a site
Two-factor authentication is available on every portal, and it can be required for every user across the whole portal, or just for the users on one site. Users who already have it sign in as normal. Anyone without it must set it up at their next sign-in.
💡 Tip: Enforcement follows the user, not the site. If someone belongs to one site that enforces two-factor, it applies to them on every site they use.
Find out more
Full details of every setting can be found in Pharos Cloud documentation under User options. New to Pharos Cloud? Start with the Quick start.
